

From research to web app


If the title made it sound complex, let me tell you, it's not. This is how I developed this little web app which runs a 3D pose estimator and a pose classifier on the web browser. The project is based on the paper Sinhala Fingerspelling Sign Language Recognition with Computer Vision which is a study about developing a real time translator for sign language using a small set of training data. The experimental setup is implemented in Python, and it's capable of running at 30 FPS on a desktop. It mainly does two things, generate a 3D skeleton of a hand from an image or a video frame, and classify it to identify the sign it represents.
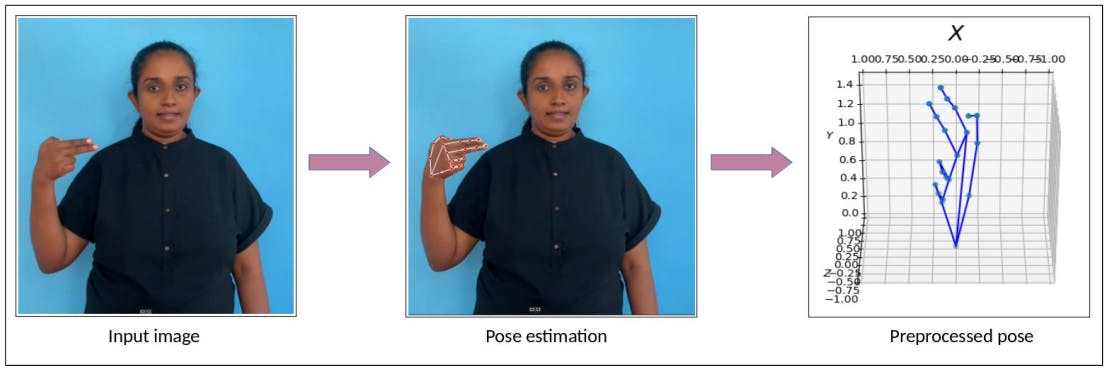 Pose estimation and preprocessing
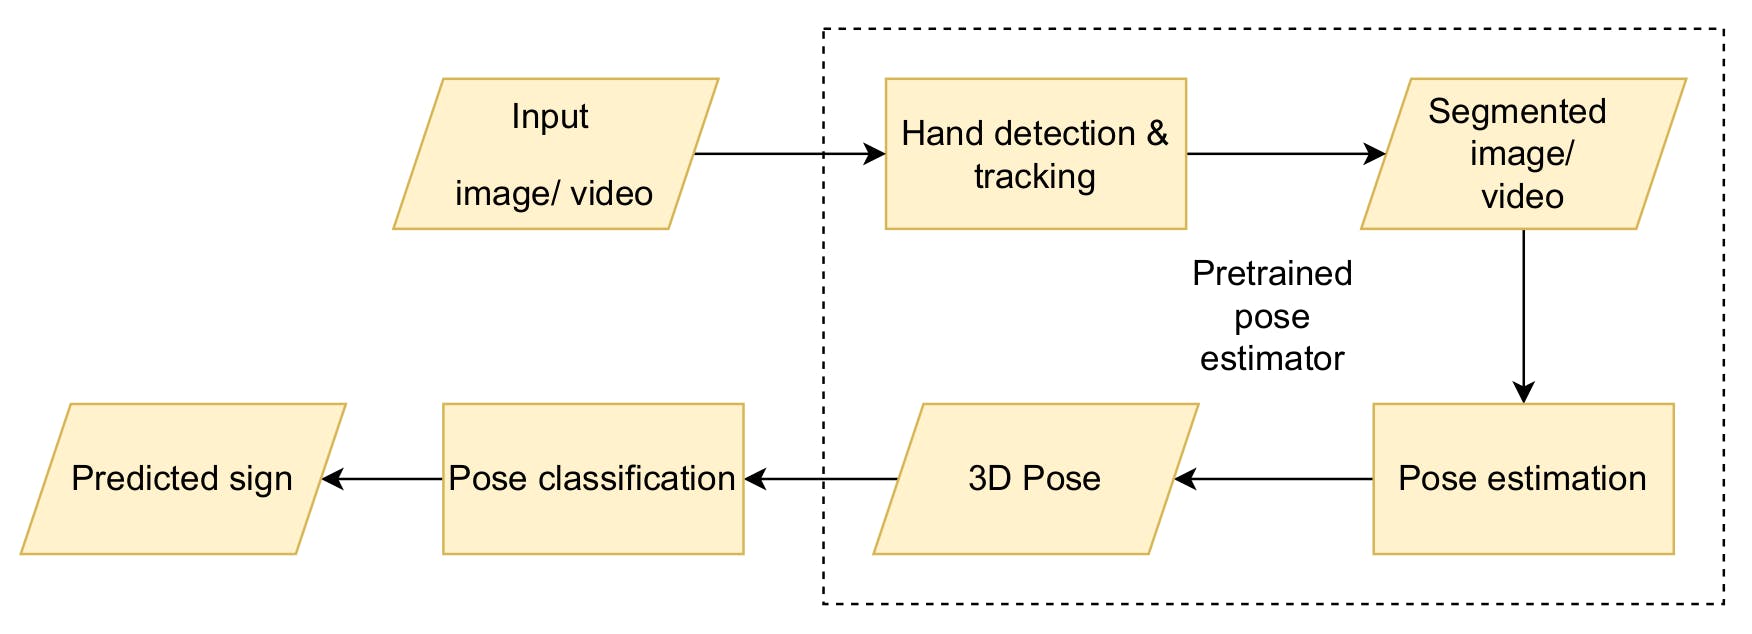 High level architecture of the classifier
Although it has a valuable core which can be used in real world sign language translation, the experimental setup isn't much useful for anything else but to demonstrate the results of the research. It would make it more accessible to a lot of people if we could serve the functionality of the trained model without having to install it and it's dependencies. Yes, we are talking about a web app. The question is, how do we do it? There are a few constraints which shape up the design.
First and foremost, it has to be real time.
Let's think about a setup where we run a web server which exposes the useful functionalities of the python program via a web API. We can easily use a Python framework such as Flask or Django to set up a web server with a REST API encapsulating the research project. But the success of this will depend mainly on two factors.
Having enough network speed
- if we expect to run at 30 FPS, we have at most ~33.3 ms to send an image or a pose representation to the server and get results back. This is without considering the time it takes on the local machine for tasks such as reading the video stream, processing and displaying the results, and also the time it takes for the classification, which alone takes ~ 33.3 ms in the experimental setup!
improving the speed of classification isn't part of this project. So our constraint is network latency + classification <= 33.3ms
sending the pose representation instead of the image will save bandwidth, but still < 33.3 ms is not a realistic value on most regular networks.
The server being able to scale up as the number of concurrent users increases. This isn't impossible, but it requires having some redundant and extensible computing power, which leads to more hardware, and more cost.
We could solve both of these problems if we could bring processing to the client side. That means everything has to run in the browser. Which brings us to our second constraint.
It has to be written in a language that can run on a web browser.
I'll be honest, I don't know any language other than JavaScript which qualifies. But even if there were alternatives, the following factors make JS a very good candidate:
- The pose estimator used in the research has a JS implementation
- There are machine learning solutions such as TensorFlow availeble as JS packages (could be helpful in implementing the classifier).
- Many tools are available for creating a decent UI (even for those with little experience in front-end development).
However, rewriting everything in JS doesn't sound like a very efficient approach. Instead, what if it was possible to reuse some of the work already done in the research setup? We don't want to train models in the web app. It only needs to run classification using a trained model.
It has to use models trained using Python.
That sounds like a bummer, but not really. Let's take a closer look at the classification model. It mainly has 2 steps. In step 1, there is an ensemble comprising 3 models and step 2 is a rule based classifier.
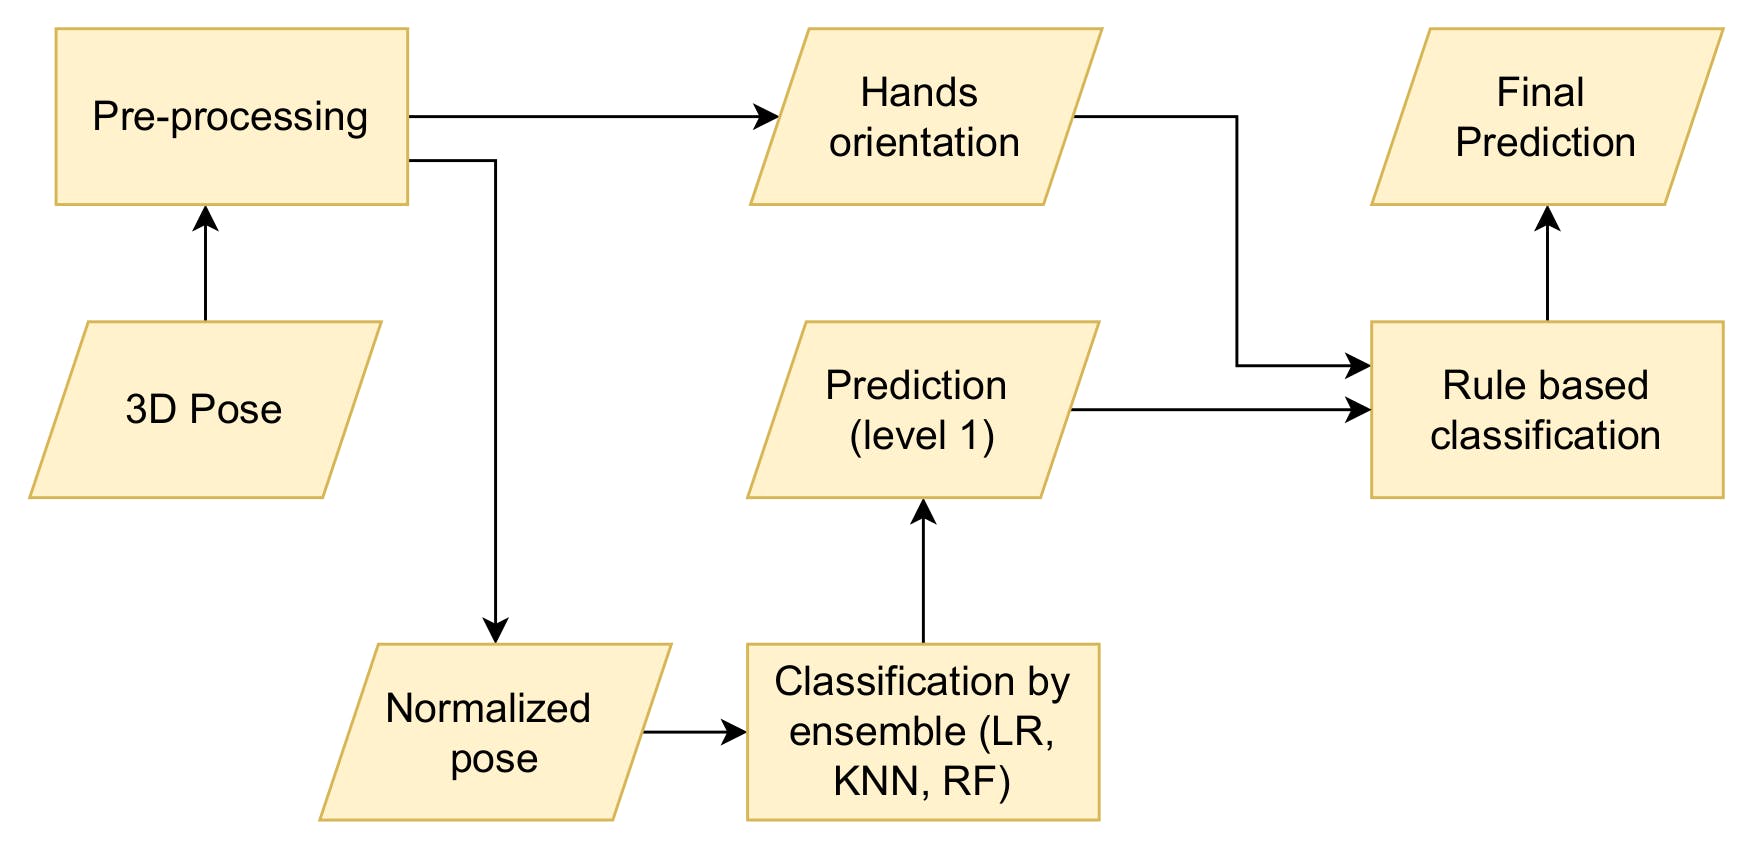 Internal steps of the classifier
Rule based classifier can easily be implemented in JS.
Internal steps of the classifier
Rule based classifier can easily be implemented in JS.
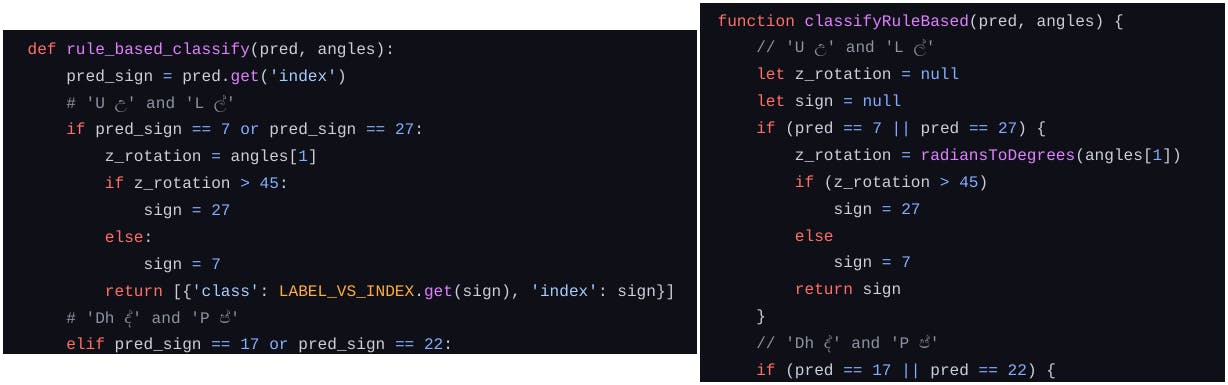 Part of the rule based classification implemented in Python (left) and JS (right)
Coming back to step 1 classifier, it's an ensemble consisting of a K-Nearest Neighbour, Logistic Regression, and Random Forest models. I found this awesome tool called m2cgen which can convert some models trained using Scikit-learn to JS code. With the help of that, LR and RF models can be converted to JS functions which take feature values as input parameters and return the class, i.e., the corresponding sign. The only piece missing from the puzzle is the KNN model. The m2cgen package didn't support it. However, there is a workaround. KNN model is little different from the other 2 when it comes to training. It doesn't run an iterative training process but holds training data and evaluates the incoming data based on its distance to training data. It's not very difficult to write a JS script to do it. And it's even less difficult to use what someone has already written. So I used ml-knn. The pose estimator returns an array containing 21 elements, which are 3D coordinates of landmarks (joint locations) of the hand. Then it's just a matter of preprocessing the input and building the feature vector to interface with the classification model. The estimator is available as a NodeJS module on NPM.
Phase one is complete. What remains is hooking up the pose estimator with a webcam through the browser. Luckily, I'm not the first one to try that. A Google search gives a couple of useful examples to try out. I used react-webcam to access the web cam and feed the video to the pose estimator. That's it! We have a fully functional web app with a machine learning model embedded in it. But we are not done just yet. The classifier is trained on a limited dataset, and it could use more examples to improve itself. So, as users try signs and the model tries to classify them, it also sends a few samples to a back-end server, which are stored to be used for further improving the model. This is implemented as an optional feature, which the user can enable and disable from the UI.
The source code of the project is available on Github. If you are a developer and like to improve this, it's up for grabs!